Here's the blank slate I started with. This was after I tore out part of the old mantle (brick) and then was drywalled. We added furring strips to the fireplace so that we'd have something to attach the drywall to. The hearth was also leveled and straightened with mortar and 2" concrete block. The original hearth was concrete and had sunk and cracked.


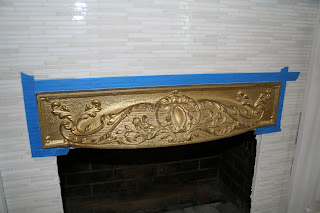
This was how it looked before attaching everything. Notice how the cast-iron surround looked before modification.
And here's how it looked after everything was attached. The mantle was a bit out of line and I had to take it apart partially so that I could reattach some of the loose trim. Wasn't too hard. It was attached to the wall with 2 1/2" trim nails from a Paslode cordless trim nailer. If you are doing a lot of trim work, I would highly recommend it. We found ours in eBay many years ago. As you can see the cast-iron surround was modified. Since it was too narrow for the electric fireplace insert, we cut off the sides with a metal cutting saw.
The top of the surround was attached with lots of Liquid Nail. That stuff holds anything! Then I painted the mantle because I didn't want to have to paint around the tile that I was adding next (it turned out I still did because the grout took some of the paint off).

After tiling and grouting the face and hearth, I was getting closer.
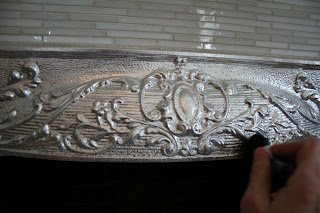
I wanted to change the surround to match the other finishes in our house. Most everything is nickle or silver. I decided to silver leaf instead of just painting. I started by sanding the surface to rough it up some.

This is the leafing I used. I got it at Michael's along with the sizing (used to stick the leafing) for less than $10.00 with my coupon.
The next step was to put on the sizing. Make sure to get it all over the area you plan to leaf. It just needs to dry a bit until it is no longer wet, just tacky.
After it is ready to go, just take the leafing and put it on the surface. The leafing that I bought was stuck to the paper. I'm not sure this was the best for this project, because it might have been easier with the detached sheet. Anyway, I just kept putting the sheet over the missing sections on the surround and rubbed with my finger until it was all covered.
To clean off the little bits that stuck up or were not attached, you simply run a soft brush over the surface until done.
After I was happy with the coverage, I had to seal the leafing to protect it and so that it won't tarnish. I used a non-water based sealer.
After that was done, I added trim to the hearth since it sits higher than the floor. We had to scribe it and fit it a couple of times to make sure it was flush. It was also attached with lots of Liquid Nail.
And here is the finished product. I am so happy with how it turned out.


Oh, it is just simply gorgeous! I love how you incorporated the cast iron surround and made it work for you - the patina is so pretty! That is so good to know about the liquid nail. I've been wondering how I was going to attach mine. Thank you so much sharing! It turned out beautifully!
ReplyDeleteWow!
ReplyDeleteThis is just beautiful...love the silver leafing!
ReplyDelete